


The Best Free VST Plugins for Breakbeat Mastering
The breakbeat music genre has gained popularity in the electronic music scene due to its energy and distinctive rhythm. Mastering is essential to ensure that your breakbeat tracks sound crisp and powerful. Fortunately, there are numerous free mastering plugins that can help you refine your sound without spending money. In this article, we will explore some of the best free VST plugins you can use to enhance your breakbeat mixes.
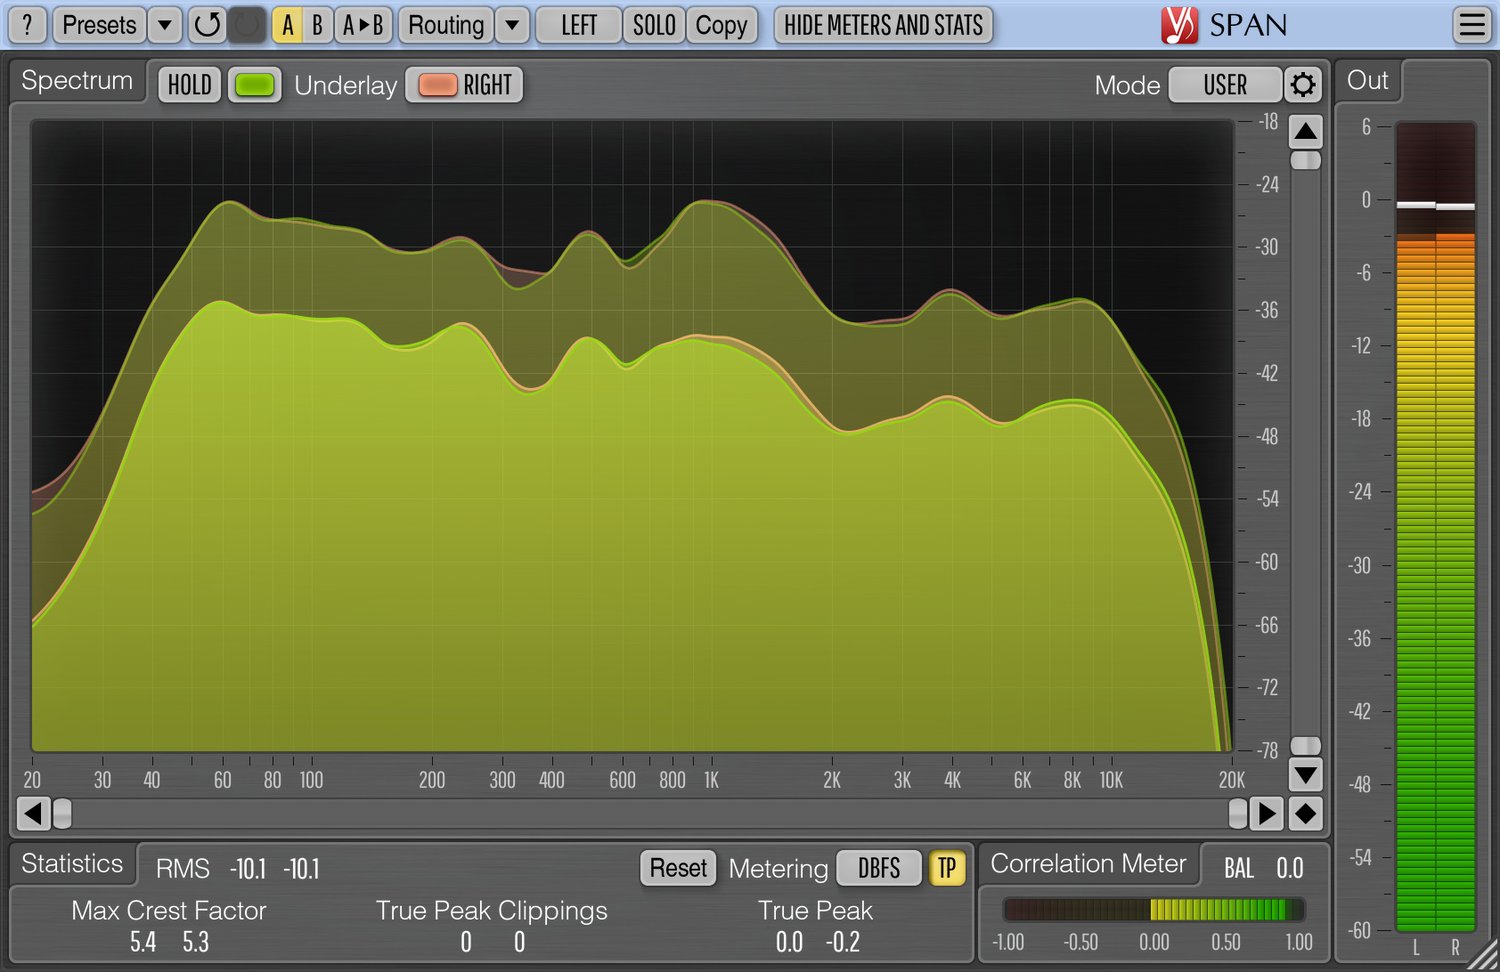
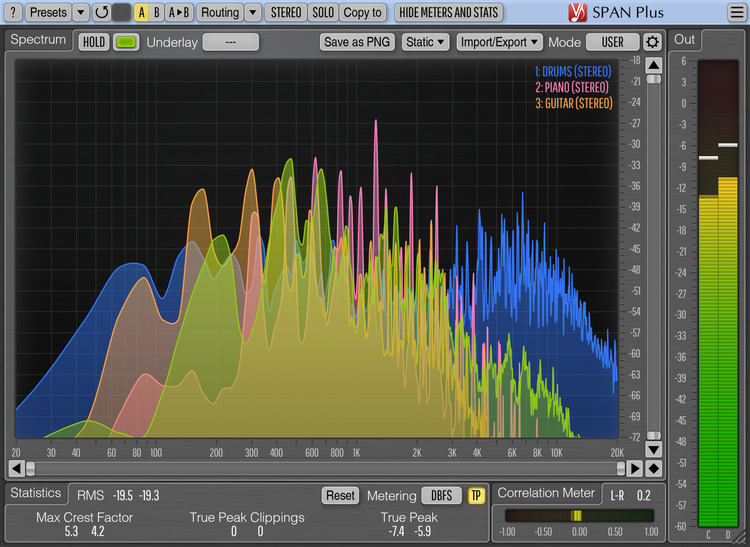
1. SPAN - Spectrum Analyzer
One of the key aspects of mastering is understanding the frequency distribution in your mix. SPAN is a powerful spectrum analysis plugin that allows you to precisely visualize the tonal characteristics of your breakbeat track. You can identify frequency issues and ensure that each element has its own space in the spectrum.
How to use SPAN in 5 steps:
- Step 1: Load SPAN onto your DAW's master track.
- Step 2: Play your breakbeat track.
- Step 3: Observe the spectrum graph to identify problematic frequency areas.
- Step 4: Adjust the equalization to correct the identified irregularities.
- Step 5: Ensure that each element has its own space in the spectrum for a balanced mix.
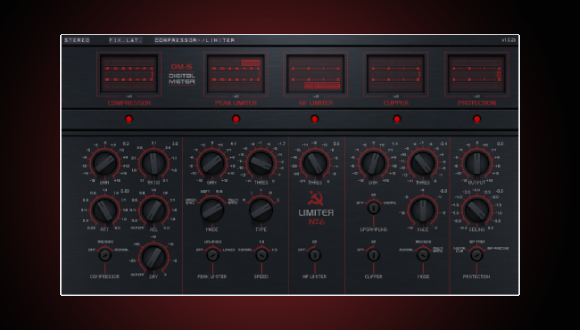
2. Limiter No6 - Dynamics Control
For precise control over the dynamics of your breakbeat track, Limiter No6 is an excellent choice. With multiple stages of limiting and compression, this plugin allows you to even out volume fluctuations and achieve a consistent and powerful sound.
How to use Limiter No6 in 5 steps:
- Step 1: Insert Limiter No6 into the mastering chain.
- Step 2: Adjust the threshold level to control dynamics.
- Step 3: Use the limiting and compression stages to level the volume.
- Step 4: Listen to the mix and make adjustments as needed.
- Step 5: Ensure that the output stays within the desired limits.
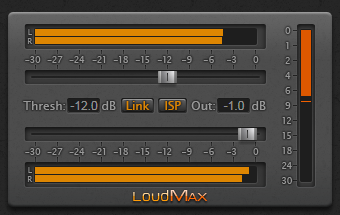
3. LoudMax - Peak Limiting
Peak volume control is essential in breakbeat mastering. LoudMax is a free peak limiter that helps you avoid unwanted distortions by keeping levels in check. This ensures that your track sounds loud and defined without sacrificing sound quality.
How to use LoudMax in 5 steps:
- Step 1: Place LoudMax on the master channel.
- Step 2: Adjust the threshold to prevent unwanted peaks.
- Step 3: Monitor the reduction gain to control limiting.
- Step 4: Listen to the mix and adjust the threshold as needed.
- Step 5: Keep the peaks under control for a balanced, distortion-free mix.
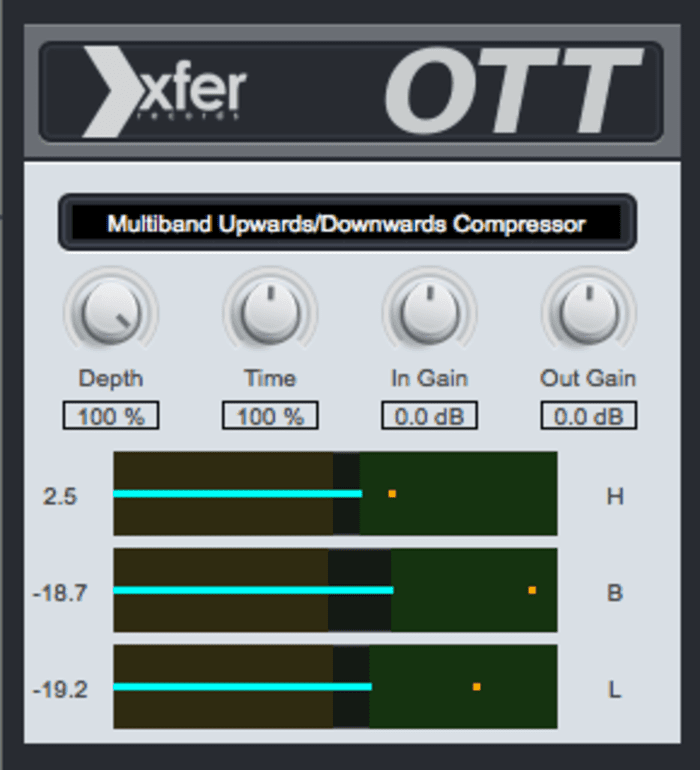
4. OTT - Multiband Compression
To balance the frequencies in your breakbeat mix, the multiband compressor OTT can be your ally. With the ability to control individual frequency bands, you can enhance key elements like drum rhythms and melodic elements, ensuring that your track has the desired impact.
How to use OTT in 5 steps:
- Step 1: Load OTT on an effects track.
- Step 2: Adjust the frequency bands according to your needs.
- Step 3: Apply compression to the individual bands.
- Step 4: Adjust the amount of compression to achieve the desired impact.
- Step 5: Monitor the mix and adjust the compression for a balanced sound.
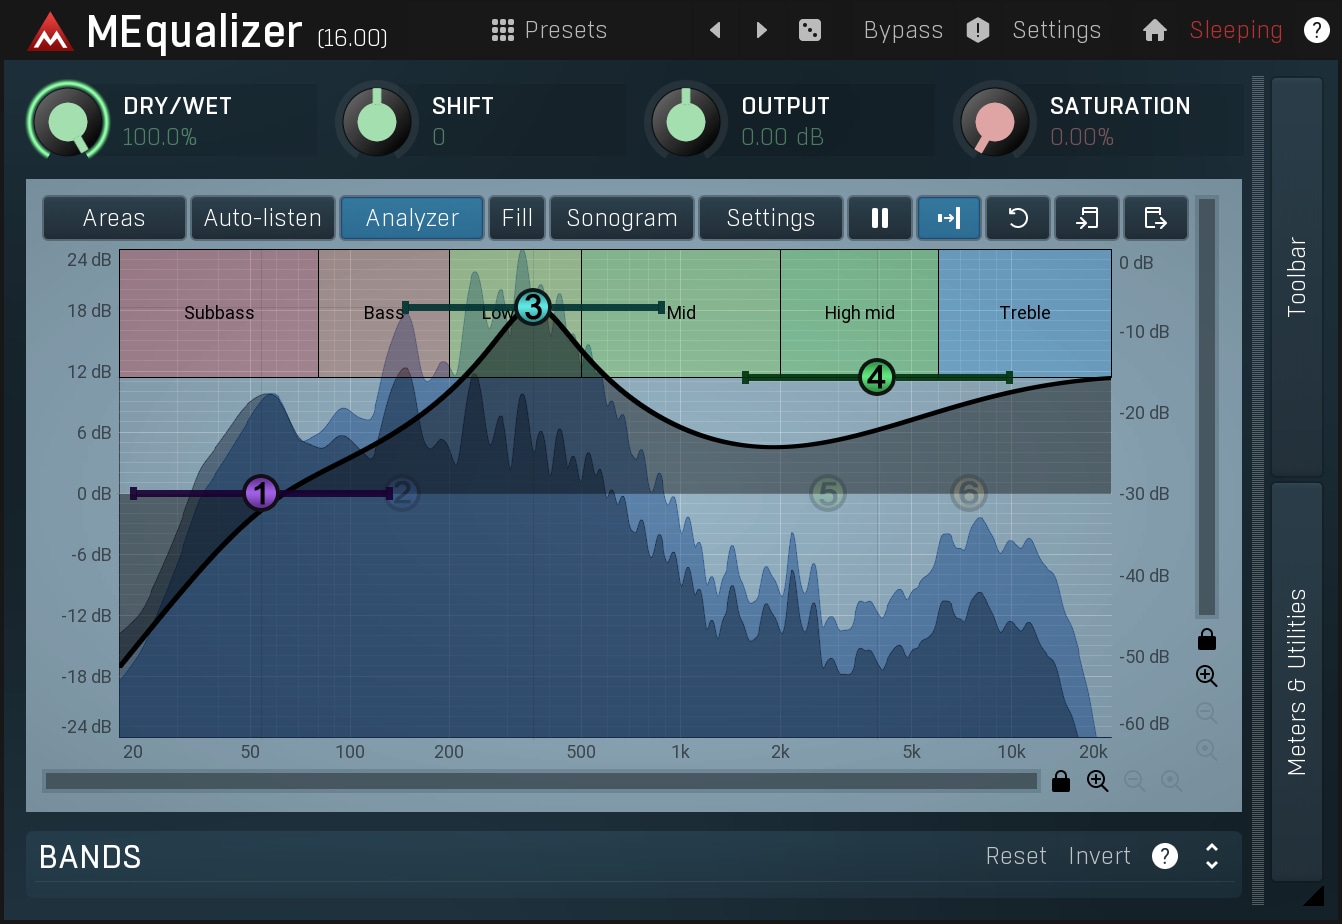
5. MEqualizer - Precise Equalization
A versatile equalizer like MEqualizer is essential for refining the sound of your breakbeat track. You can precisely adjust frequencies, enhance details, and correct tonal issues, achieving a balanced and powerful mix.
How to use MEqualizer in 5 steps:
- Step 1: Insert MEqualizer into the mastering chain.
- Step 2: Adjust the frequency bands according to your equalization needs.
- Step 3: Listen to the mix and identify problematic areas.
- Step 4: Add or reduce frequencies to correct tonal issues.
- Step 5: Ensure that the mix has a perfect tonal balance.
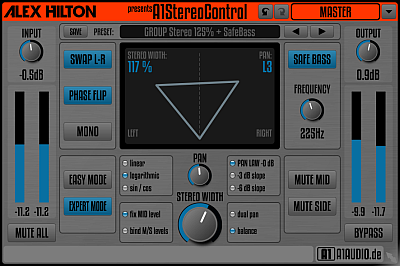
6. A1StereoControl - Stereo Expansion
To create a wide and immersive stereo image in your breakbeat music, A1StereoControl can be a valuable addition. You can adjust stereo width and make elements spread across the auditory panorama, enhancing the track's immersion.
How to use A1StereoControl in 5 steps:
- Step 1: Insert A1StereoControl on the mastering channel.
- Step 2: Adjust the stereo width to expand or reduce the stereo image.
- Step 3: Listen to the mix and adjust the width as needed.
- Step 4: Ensure that elements spread across the auditory panorama.
- Step 5: Experiment with different settings to achieve the desired immersion in the track.
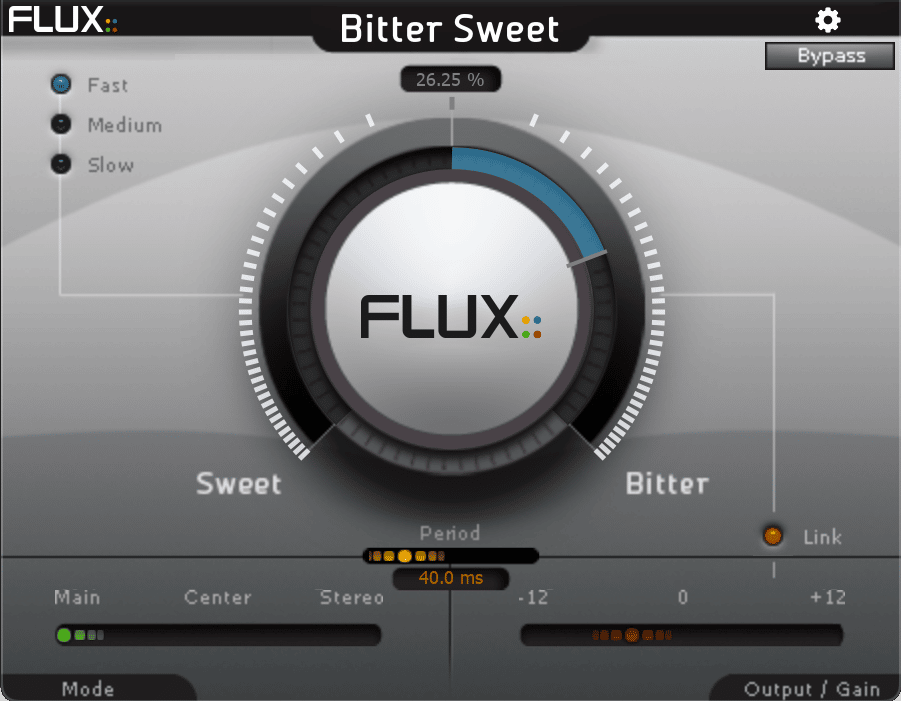
7. BitterSweet - Transient Control
Transient response is crucial in genres like breakbeat, where percussion and rhythm elements are fundamental. BitterSweet is a plugin that allows you to effectively adjust transient response, enabling you to refine the articulation of rhythmic elements.
How to use BitterSweet in 5 steps:
- Step 1: Place BitterSweet on the mastering track.
- Step 2: Adjust the transient control to smooth or accentuate the attacks.
- Step 3: Listen to the percussion and adjust the transient response as needed.
- Step 4: Experiment with different settings to refine rhythmic articulation.
- Step 5: Ensure that the percussion has the desired character in the breakbeat mix.
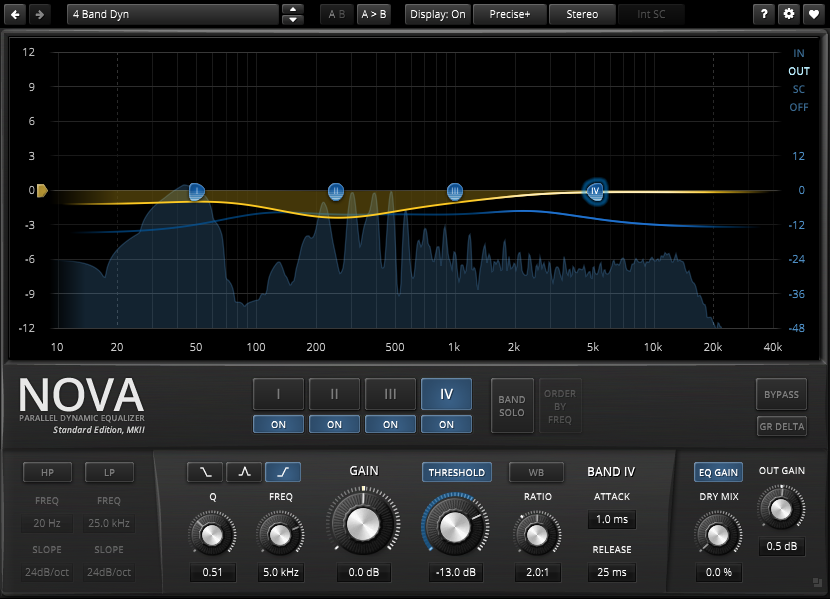
8. TDR Nova - Dynamic Equalization
Resonance issues can negatively impact your breakbeat mix. With TDR Nova, you can address these problems through dynamic equalization, allowing you to control and eliminate unwanted resonances, improving the overall clarity of the track.
How to use TDR Nova in 5 steps:
- Step 1: Insert TDR Nova into the mastering chain.
- Step 2: Identify problematic frequencies in the breakbeat mix.
- Step 3: Adjust dynamic equalization to control unwanted resonances.
- Step 4: Monitor the overall clarity of the track and remove unwanted resonances.
- Step 5: Ensure that the breakbeat mix sounds clean and clear.
9. Voxengo SPAN - Advanced Metering
Similar to SPAN, Voxengo SPAN offers advanced spectrum metering. You can accurately monitor frequency distribution and ensure that each element is in its proper place in the tonal spectrum.
How to use Voxengo SPAN in 5 steps:
- Step 1: Load Voxengo SPAN onto the mastering channel.
- Step 2: Play your breakbeat track.
- Step 3: Use the advanced metering tools to analyze the spectrum.
- Step 4: Identify areas where equalization or dynamic adjustments are needed.
- Step 5: Adjust your breakbeat mix accordingly for a balanced frequency distribution.
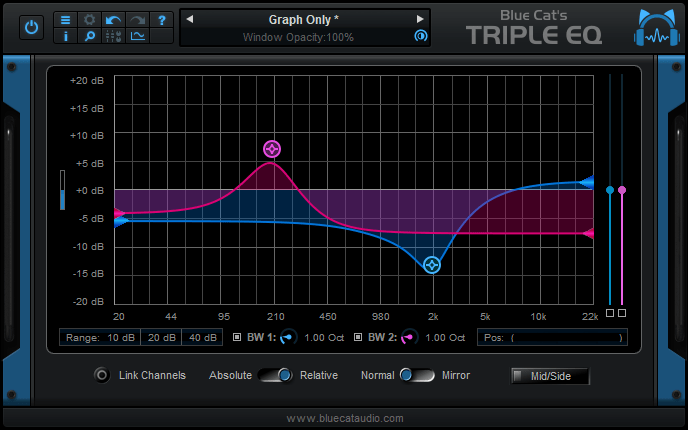
10. Blue Cat's Triple EQ - Graphic Equalization
This graphic equalizer allows you to precisely sculpt the sound of your breakbeat tracks. Control individual frequencies and shape your mix to achieve a perfect tonal balance.
How to use Blue Cat's Triple EQ in 5 steps:
- Step 1: Insert Blue Cat's Triple EQ into the mastering chain.
- Step 2: Adjust the graphic equalization bands for the frequencies you want to modify.
- Step 3: Listen to the mix and identify areas that need equalization.
- Step 4: Apply frequency boosts or cuts as needed.
- Step 5: Ensure that the breakbeat mix has a perfect tonal balance.
11. LVC-Audio Limited-MAX - Transparent Limiter
If you're looking for a transparent limiter for your breakbeat mixes, LVC-Audio's Limited-MAX could be your choice. It preserves the character of your music while effectively controlling dynamics.
How to use LVC-Audio Limited-MAX in 5 steps:
- Step 1: Place LVC-Audio Limited-MAX on the mastering channel.
- Step 2: Adjust the threshold and limiting settings to your preferences.
- Step 3: Listen to the mix and ensure that the limiting is transparent.
- Step 4: Monitor the dynamics to prevent unwanted distortions.
- Step 5: Maintain sound quality while limiting your breakbeat music.
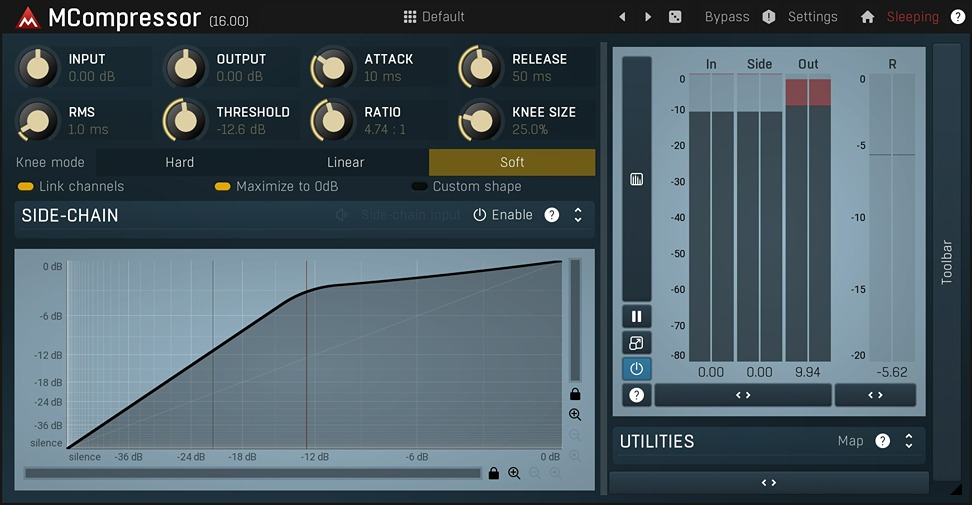
12. MCompressor - Versatile Compression
Add a touch of versatile compression to your tracks with MCompressor. This free plugin allows you to control dynamics and bring cohesion to your breakbeat elements.
How to use MCompressor in 5 steps:
- Step 1: Insert MCompressor into your DAW's mastering chain.
- Step 2: Adjust compression parameters such as ratio and threshold.
- Step 3: Listen to the mix and control dynamics to your preferences.
- Step 4: Experiment with different settings to achieve cohesion in the mix.
- Step 5: Ensure that your breakbeat music has the desired dynamics.
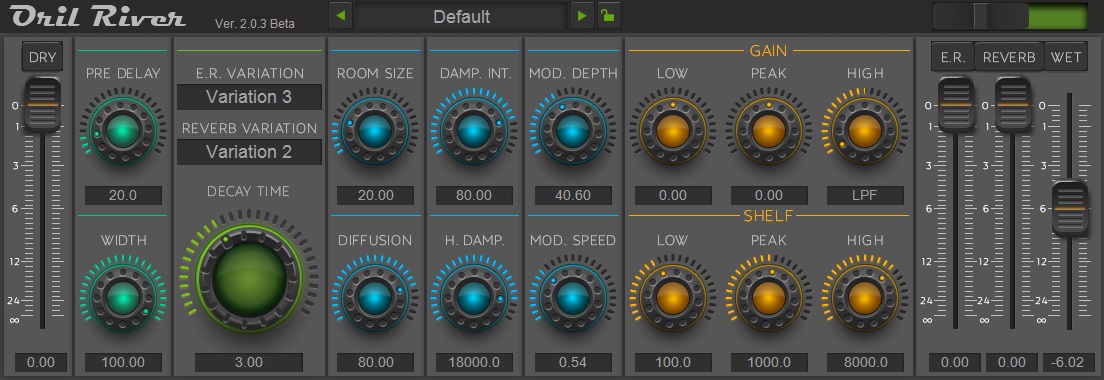
13. OrilRiver - Quality Reverb
If you want to add depth and space to your breakbeat tracks, OrilRiver is a reverb worth trying. It offers detailed configuration options to suit your sonic style.
How to use OrilRiver in 5 steps:
- Step 1: Insert OrilRiver on an auxiliary effects track.
- Step 2: Adjust reverb parameters such as decay time and mix.
- Step 3: Apply reverb subtly to add depth to the mix.
- Step 4: Adjust the settings to match the style of your breakbeat music.
- Step 5: Monitor the mix and ensure that the reverb enriches the atmosphere of the track.


Comments ()